
Hello All,
The idea of Thumbelina started with an order where a girl we've known for long wanted something on the lines of Monalisa set. It's not in our fabric to repeat designs, so we started racking our brains for some new idea. After almost a week of thinking, a brain wave struck, where an unused (and largely ignored) bust became an inspiration.....we created a face using a mold but did modifications to the face to make the eyes look enchanting. Sculpting must be one hell of a task and we realized it as we worked with just the eyes of the dame! Our dame became the centre of a gigantic flower in pale yellow gold, with reinforcements at the back to keep the flower strong (oh yes, at Art'zire, we are manic about the strength of the pieces being made)........the bail was modified accordingly to sit properly over the floral centrepiece (compared to the earlier one, where the cut was straight).

The basic idea started forming and then, the colour scheme of the template saree solved the rest of the puzzle for us.

Yellow and purple together can conjure up only one image that fits to a T.........pansies. These little flowers look adorable as they grow in bunches and look like smiling children about to play a prank on you......
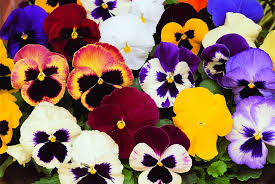
We chose pansies, all right but the size we were working on was SO small that we went back and forth with how to handle the polymer clay as such small scales. After trying all kinds of combinations, we settled for yellow surrounded by purple and plain purple as the combinations we'd work with. Painstaking work involving serious focus led to the bunch of pansies that adorned both the bail and the flower. The fairy at the centre was allowed to keep long hair ;) which also became the loop for our dangler at the base.
The final step, namely the make-up of the fairy turned out to be a daunting task in its own right! The eyes are about 5 mm wide and 2.5 mm high. Make-up in double shades on the eyelid seemed like the miniscule dissections one does in the high-school. A 00 number brush also seemed to be overwhelmingly big but then we pulled it off and she ended up looking every bit as alluring as we intended her to look :)
So, here we go, Thumbelina for everyone :)

The idea of Thumbelina started with an order where a girl we've known for long wanted something on the lines of Monalisa set. It's not in our fabric to repeat designs, so we started racking our brains for some new idea. After almost a week of thinking, a brain wave struck, where an unused (and largely ignored) bust became an inspiration.....we created a face using a mold but did modifications to the face to make the eyes look enchanting. Sculpting must be one hell of a task and we realized it as we worked with just the eyes of the dame! Our dame became the centre of a gigantic flower in pale yellow gold, with reinforcements at the back to keep the flower strong (oh yes, at Art'zire, we are manic about the strength of the pieces being made)........the bail was modified accordingly to sit properly over the floral centrepiece (compared to the earlier one, where the cut was straight).

The basic idea started forming and then, the colour scheme of the template saree solved the rest of the puzzle for us.

Yellow and purple together can conjure up only one image that fits to a T.........pansies. These little flowers look adorable as they grow in bunches and look like smiling children about to play a prank on you......
We chose pansies, all right but the size we were working on was SO small that we went back and forth with how to handle the polymer clay as such small scales. After trying all kinds of combinations, we settled for yellow surrounded by purple and plain purple as the combinations we'd work with. Painstaking work involving serious focus led to the bunch of pansies that adorned both the bail and the flower. The fairy at the centre was allowed to keep long hair ;) which also became the loop for our dangler at the base.
The final step, namely the make-up of the fairy turned out to be a daunting task in its own right! The eyes are about 5 mm wide and 2.5 mm high. Make-up in double shades on the eyelid seemed like the miniscule dissections one does in the high-school. A 00 number brush also seemed to be overwhelmingly big but then we pulled it off and she ended up looking every bit as alluring as we intended her to look :)
So, here we go, Thumbelina for everyone :)


